In today's post, I'm featuring another project I created for display at
The Scrapbooking Studio in Bloomington, IL.
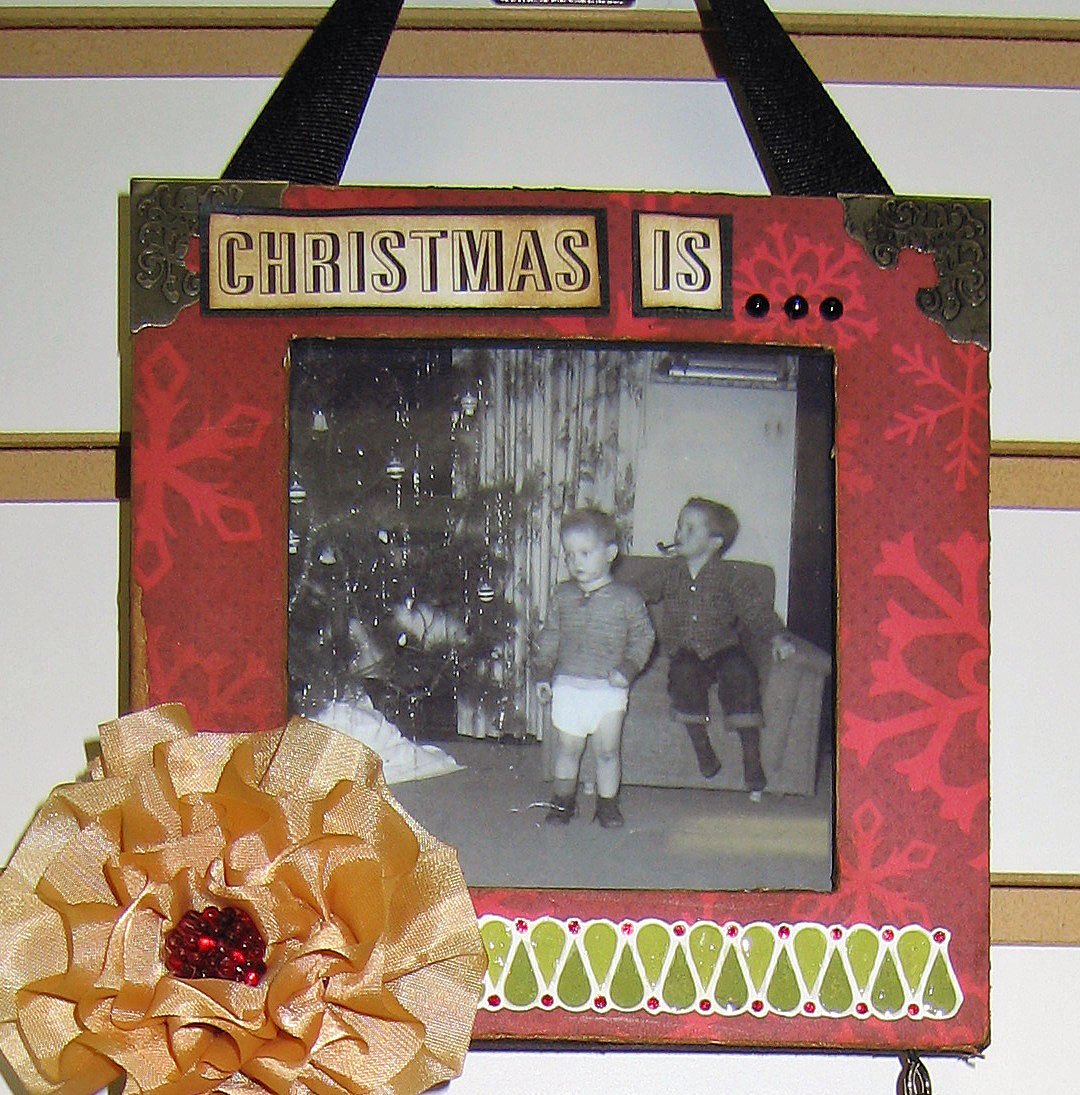
I love looking through my mom's old picture album when she and my dad first started their family. The photos I used here are of my brothers at Christmas time 1961. My parents never did have a lot of money, but they made up for it in love and filled our home with happiness.
I'm featuring papers from Echo Park Season's Greetings Collection. But you'll see pieces and parts from many of my favorite designers and companies including Maya Road, Ranger, Tim Holtz, and Kaiser Craft.
Here's the entire wall hanging. The frame is just a cheap bare wood frame that I bought a few years ago. I think I got it at one of the big chain hobby stores. I painted it with black acrylic paint. I cut
Echo Park Ornaments paper the size of each frame and then distressed each piece with a paper distressing tool and distressed with Brushed Corduroy Distress Ink. I glued each piece to one of the frames and then used an Exacto knife to cut out the center. Finally, I took sand paper and gave all the edges a worn look and distressed again with Brushed Corduroy Distress Ink.
For the words on each frame, I actually cut the phrase from a piece of
Seasons Greetings Borders paper. Here are the details of each frame.
I used Tim Holtz Idea-ology Metal Corners. The green strip at the bottom is cut from the Echo Park Season's Greetings Borders paper. I added Glossy Accents over the green and Christmas Red Stickles over the red dots. No project is complete without Stickles! :) The flower I made from Maya Road
Satin Pleat Edging in Golden Yellow. It's super easy to make. Just follow the instructions in this
video. The center of the flower is a clear Raspberry Bead from Maya Road that I colored with Alcohol Inks....or you could use Copic Refill.
Here's the second frame:
The background paper is cut from a sheet of
Echo Park Season's Greetings Christmas Ads paper. I just distressed it slightly with Antique Linen Distress Ink. I cut one of the cards from the
Journaling Cards paper and adhered it to a piece cut from the reverse side of the Christmas Ads paper. The list of toys are actually toys from the 1961 era. In fact, I'm pretty sure my oldest brother received the Handy Andy Tool Set which contained REAL miniature sized tools for kids. There's a large chunk out of a concrete pole in my parent's basement as proof they really worked!
The
vintage wood snowflakes are from Maya Road and I just distressed them with Brushed Corduroy Distress Ink and added a red rhinestone to the center. The tree, I die cut out of
Grunge Paper using Sizzix Tim Holtz
Snow Tree die. I cut a second tree out of the reverse side of the Echo Park
Poinsettias paper and distressed it with Antique Linen Distress Ink and adhered it to the Grunge Paper tree. I just added a bit of Star Dust Stickles to the swirls on the tree.
Finally, the third frame...
Again, I added the metal corners from Tim Holtz. The wood curl is from
Kaisercraft. I just colored it black with a Sharpie and then covered with Diamond Stickles. The stickles are clear until you use them on a dark background. I didn't even realize they would come out this yellowish green! The metal charm is from the Tim Holtz Idea-ology Christmas Adornment pack. I colored the holly and ribbon with Copic markers.
Sorry for such a long explanation! The best part is that all of the supplies to make this project are available at
The Scrapbooking Studio in Bloomington or Moline, IL!
Talk to you soon!
Linda